
Reviewed · BALINESE CRAFT & ART WORKSHOPS
3 Hours Wheel Throwing Basic Ceramic Class
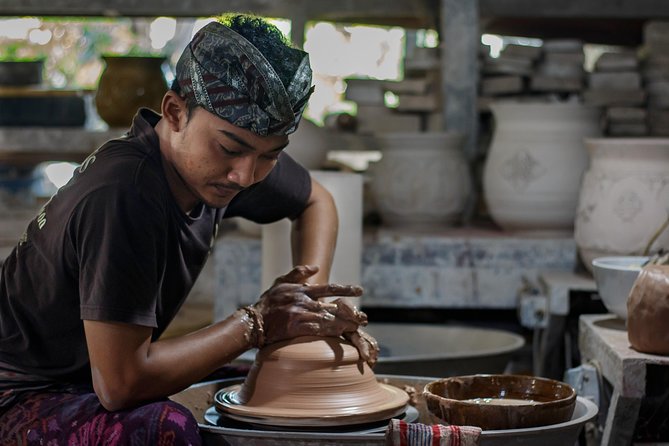
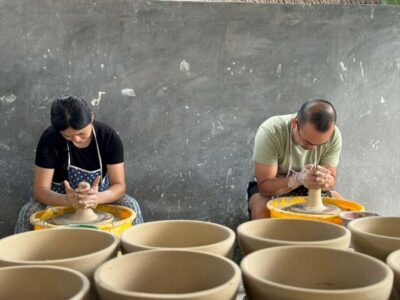
Your hands learn clay fast. In a Ubud pottery factory, you’ll get real practice on the wheel while making functional-looking ceramics, not just a quick souvenir. It’s a 3-hour basic wheel-throwing class where you can work with up to 3 kg of clay, then choose up to 3 pieces to take home.
What I like most is the hands-on setup and the fact that you’re in their working ceramic space. You can see the tools and machinery they use day-to-day, and that makes the lesson feel grounded instead of staged. One thing to plan for: the glaze and firing (combustion) are not included and take 1–4 weeks, so your first-day results may look unfinished until the final process is done.
In This Review
- Why This Ubud Wheel Throwing Class Works
- What You’ll Do During the 3 Hours (Step by Step)
- 1) Meet at the factory area, get geared up
- 2) Scaling and kneading: how the clay stops fighting you
- 3) Wheel throwing basics: machine use + hand balancing
- 4) Make a few tries, then pick your top pieces
- 5) Leave the rest of the work to the kiln (timing matters)
- Inside the Factory: The Practical Value of Seeing the Tools
- Price, Value, and What’s Actually Included
- The Biggest Considerations Before You Go
- You might not leave with finished ceramics immediately
- Communication can be frustrating if you rely only on message chains
- Your best pieces matter
- Who This Class Is Best For (And Who Might Want to Skip It)
- Tips to Get Better Results (Without Stress)
- Should You Book This Ubud Wheel Throwing Class?
- FAQ
- How long is the wheel throwing class?
- How much does the class cost?
- Where does the class start and end?
- Is this a private class or shared group?
- What’s included in the price?
- Will I be able to take my ceramics home?
- Is glazing and baking included?
- How many pieces can be glazed and fired?
- What should I bring for lunch or snacks?
- What if the weather is bad?
Why This Ubud Wheel Throwing Class Works
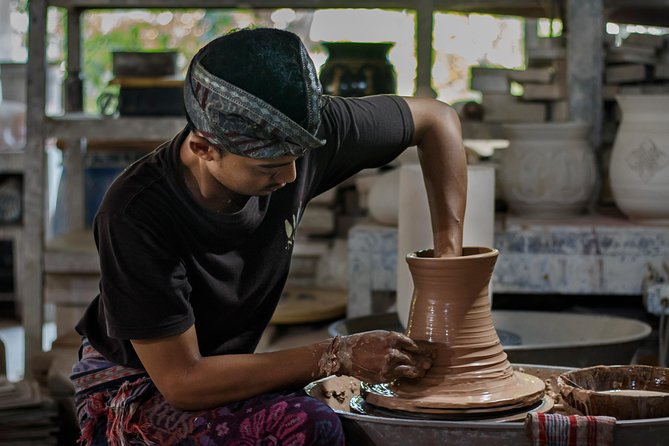
This class is built around the fundamentals: scaling and kneading clay, learning how the wheel machine feels, and using hand technique to balance the clay as it spins. If you’ve ever watched pottery videos and thought it looks impossible, you’ll be happy to know they teach the steps you need to make the wheel behave.
You’re not just copying one demo. You’re shaping your own items—within the limits of what you can confidently handle in a 3-hour session. And since you’re allowed to experiment with a bigger clay supply, you get the chance to make mistakes without panicking every time your form wobbles.
Batik wax, wet clay and carving chisels, hands-on.
- Crafting Heritage Batik Painting Workshops★ 5.0 · 164 reviews
- Ubud: Ceramic Pottery Class with 2 kg Clay★ 4.8 · 91 reviews
- Outskirts of Ubud, Gianyar: Pottery Class★ 5.0 · 9 reviews
- 3 Hours Wheel Throwing Basic Ceramic Class★ 4.0 · 3 reviews
What You’ll Do During the 3 Hours (Step by Step)
The class runs about 3 hours in their own factory in the Guwang area near Ubud. You start and end at the same meeting point on Jl. Nakula No.511, so you’re not juggling extra drop-offs after your hands turn into clay mittens.
1) Meet at the factory area, get geared up
You’ll meet at Jl. Nakula No.511, Guwang, Kec. Sukawati, Kabupaten Gianyar, Bali 80582. Once you’re there, you’ll be working in their factory space with the tools and equipment used in everyday ceramic production.
They provide an apron, plus bottled water. That’s helpful because wheel throwing can get messy fast. Still, I’d come dressed for paint-and-clay day—wear something you don’t mind getting dusty.
2) Scaling and kneading: how the clay stops fighting you
Before the wheel even gets involved, you’ll work on scaling and kneading the clay. This is one of those unglamorous steps that matters a lot. If clay isn’t properly prepped, it tears, slumps, and won’t center.
This is also where you learn the basic clay source and the ceramic type you’re working with. You’ll get the logic behind the process: what the clay is doing, and why centering and compression make your life easier on the wheel.
Other Ubud tours and experiences to line up next




3) Wheel throwing basics: machine use + hand balancing
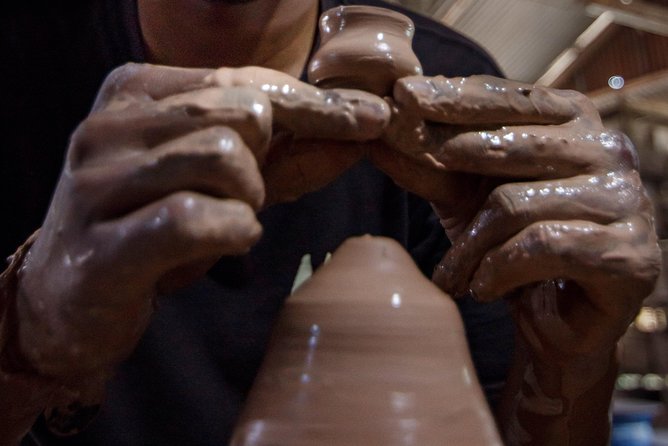
Then comes the fun part. You’ll use the wheel throwing machine and practice the hand technique needed to pull and shape the clay as it spins. The class is described as starting from clay portions (you’ll be told the starting amount and work through the forming steps), and you’ll work toward your own shape choices.
You’ll get instruction on:
- basic wheel operation and what to watch for while it’s spinning
- hand placement and how to balance pressure
- how to form and refine your piece as it takes shape
In plain terms: you’ll learn how to guide the clay rather than forcing it.
4) Make a few tries, then pick your top pieces
A big advantage here is that you can experiment and create multiple forms. The class mentions working with a larger clay amount (up to 3 kg total) and forming different shapes. You’re encouraged to make more than one piece so you can improve as you go.
When it’s time to choose, you’ll select your best 3 creations. Those are the pieces tied to the “take home” limit, and they’re also the ones that can go through the glaze and combustion process (if you choose that route).
5) Leave the rest of the work to the kiln (timing matters)
Your in-class time is focused on shaping. The class notes that glaze and combustion (firing) take about 1 week up to 4 weeks. That means your final, glazed ceramic outcome may not be ready immediately after class.
Also important: combustion for the final product is not included in the listed price. So your finished results can depend on what options you choose after class and what extra fees apply for firing/glazing.
Inside the Factory: The Practical Value of Seeing the Tools
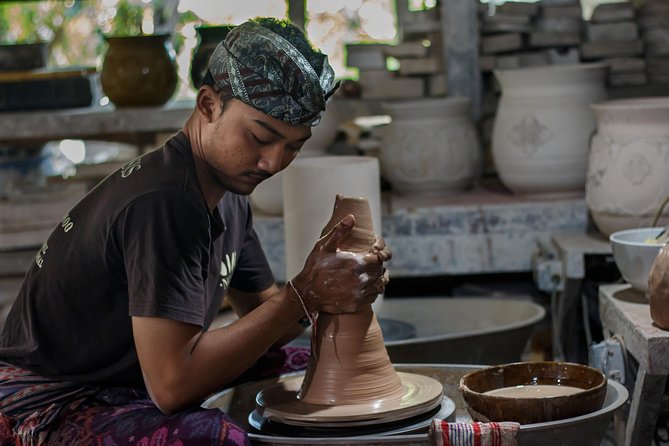
One reason I’d pick this over a purely “craft demo” style workshop is the factory setting. The class is held in their own ceramic production space, so you can see the tools, materials, and machinery they use in daily business.
That matters because wheel throwing isn’t just art—it’s a controlled process. Seeing the workflow around clay preparation, firing, and finishing helps you understand why your teacher kept returning to centering and consistent pressure. It also gives you realistic expectations for what “finished ceramic” actually requires.
If you’ve ever been disappointed by souvenir crafts that look fine once, but fall apart later, this kind of background makes the process feel more trustworthy.
Price, Value, and What’s Actually Included
The class costs $50 per person for roughly 3 hours. It’s also commonly booked about 53 days in advance, which usually tells you demand is steady.
For that price, you get:
- All materials for the session, scaled so you work with up to 3 kg of clay
- Wheel throwing machine usage
- Coloring materials if you want to vary your art
- Bottled water
- An apron
What you don’t get:
- Combustion/firing for the final product
- Lunch and snacks
- Private transportation
When it comes to value, the big point is this: you’re paying for real instruction plus time on the wheel, with enough clay to practice. If you want fully glazed and fired ceramics, you should budget additional time and likely extra cost for the final firing step since it’s explicitly not included.
One more nuance: in a response included with the class info, the provider said the baking pieces fee is not included (which matches the stated “combustion process” exclusion), but they would give one piece free of charge. I can’t promise how that applies to every booking, but it’s a helpful sign that they’re aware of the firing expectation problem.
The Biggest Considerations Before You Go
Wheel throwing is usually beginner-friendly, but it’s not effortless. Here are the practical things that can affect your experience.
You might not leave with finished ceramics immediately
Because glaze and firing take 1–4 weeks, plan on having your best results processed after class. If you need a usable mug or bowl by a specific date (like a flight day or a gift deadline), you’ll want to line that up early and ask what timing you can realistically expect.
Communication can be frustrating if you rely only on message chains
One of the provided notes highlights trouble communicating with Viator—multiple emails and calls without a response, fixed only after finding local help. That doesn’t mean it happens every time, but it’s a good reminder to book with buffer and save important details (address, booking confirmation, timing) so you aren’t stuck if replies are slow.
Your best pieces matter
Since you’re limited to 3 creations for take-home and for the glaze/combustion process, you’ll want to treat the last 30–60 minutes as your “choose and refine” window. Don’t save all your focus for the first try—clay gets easier once you get the feel.
Who This Class Is Best For (And Who Might Want to Skip It)
This works best if you:
- want hands-on creativity and enjoy learning a real skill
- are okay with messy hands for a few hours
- don’t mind waiting 1–4 weeks for fired and glazed results
- want to take home up to 3 pieces, not just one
It may be less ideal if:
- you need fully finished ceramics right away
- you’re looking for a guided tour of Bali sights rather than a workshop
- you prefer everything included and wrapped up in one day (since combustion is not included)
If you’re traveling solo, this is still a solid option because the class is private (your group only), so you’re not squeezed into a huge mixed crowd while learning wheel technique.
Tips to Get Better Results (Without Stress)
These are simple choices that usually help in wheel throwing.
- Take your best form-making time seriously near the end. Picking the top three means final tweaks count.
- Ask how the process works for your chosen pieces. Since glaze and combustion happen later, you want clarity on what gets sent for finishing.
- Wear clothes you can relax in. You’ll get clay dust on everything unless you’re ready. An apron helps, but nothing fully stops mess in a wheel workshop.
- If you’re planning gifts, pick shapes that won’t require big finishing changes. Your teacher can guide you, but your initial structure sets the outcome.
Should You Book This Ubud Wheel Throwing Class?
I’d recommend booking if you want a real wheel-throwing experience in a working ceramic factory, and you’re excited to make multiple attempts with a meaningful amount of clay. The value is strong for the instruction time: 3 hours on the wheel with enough materials to learn through trial and error.
I would hold off—or ask lots of questions first—if you need finished, fired ceramics the same day, or if you don’t want to deal with the reality that combustion isn’t included and finishing can take up to 4 weeks. Also, if you’ve got strict travel timelines and you’re the type who depends on fast message responses, build in a little extra slack.
Overall, this is a good pick for beginners who like learning by doing, and who can appreciate that the best part of ceramics is often what happens after the wheel stops.
FAQ
How long is the wheel throwing class?
The class runs for about 3 hours.
How much does the class cost?
It costs $50.00 per person.
Where does the class start and end?
It starts at Jl. Nakula No.511, Guwang, Kec. Sukawati, Kabupaten Gianyar, Bali 80582, Indonesia, and ends back at the same meeting point.
Is this a private class or shared group?
This is a private tour/activity, so only your group participates.
What’s included in the price?
You get all materials (including clay scaled for up to 3 kg), wheel throwing machine use, coloring materials if you want to vary your art, bottled water, and an apron.
Will I be able to take my ceramics home?
You can bring home your creation, with a limit of 3 best pieces.
Is glazing and baking included?
Combustion and glaze processing for final pieces takes 1 week up to 4 weeks, and the combustion process for the final product is not included.
How many pieces can be glazed and fired?
The class limits glaze and combustion to 3 creations.
What should I bring for lunch or snacks?
Lunch and snacks are not included. You’ll need to plan on that outside the class.
What if the weather is bad?
The experience requires good weather. If it’s canceled due to poor weather, you’ll be offered a different date or a full refund.
Hands-On in Ubud




More Ubud Tours We Rate





Batik, Clay & Carving



Just added around Ubud
- Ubud: White Water Rafting with visit Ubud Monkey Forest
★ 5.0 · 3 reviews - Private Guided Bali Car Charter
★ 5.0 · 3 reviews - East Bali and Lempuyang Temple Tour
★ 5.0 · 3 reviews - Bali Downhill Cycling and White Water Rafting
★ 5.0 · 3 reviews - Cave Tubing Adventure in Ubud
★ 5.0 · 3 reviews
Balinese Craft & Art Workshops, compared.
 ★ 5.03 Hours Batik Making Classes in UbudFrom $26203 reviews
 ★ 5.0Crafting Heritage Batik Painting WorkshopsFrom $29164 reviews
 ★ 4.8Ceramic Pottery Class with 2 kg ClayFrom $3691 reviews
 ★ 5.0Outskirts of Ubud, Gianyar: Pottery ClassFrom $409 reviews
Browse the lists this tour appears in