
Silver work in Ubud is the real deal. This small-group Ubud Monkey Forest Silver Class pairs a guided craft session with a big souvenir payoff, letting you make your own sterling silver piece near Monkey Forest.
I especially love the step-by-step process, from melting sterling silver 925 to sanding, filing, and polishing, so you see how the metal actually becomes jewelry. I also like that you get to take your creation home for keeps, with options for personalization like stamping or engraving.
One consideration: it can be physically demanding, and some choices (like certain styles or textures) are more hands-on than others, so you’ll want to decide your design quickly and be ready to work.
In This Review
- Key highlights at a glance
- Where the class fits in a Monkey Forest day
- Price and what $41.85 actually buys you
- The real itinerary: choose a design and turn 925 into jewelry
- 1) Pick your design and plan your piece
- 2) Learn tools and materials before you heat anything
- 3) Melt, hammer, press, and shape
- 4) Solder and then smooth everything down
- 5) Finish, polish, and take it home
- Choosing your design: personal, practical, and sometimes a little tricky
- Meet the silversmiths: helpful guidance makes the difference
- What to budget for: grams, gemstones, and the “extras” reality
- More silver than included
- Gemstones
- Keep one more rule in mind
- Snack breaks, free Wi‑Fi, and why that small stuff matters
- Accessibility and who this experience suits best
- Should you book this Ubud Monkey Forest Silver Class?
- FAQ
- How long is the Ubud Monkey Forest Silver Class?
- What silver will I make, and how much can I take home?
- Do I need any jewelry-making experience?
- What’s included in the price?
- Are there extra costs if I want more silver or gemstones?
- Where do I meet, and does this include a shuttle?
- Is the workshop wheelchair and stroller accessible?
Key highlights at a glance
- Sterling 925 from scratch: you work through key stages like heating, shaping, soldering, and finishing
- Small group size (max 10): more attention during the workshop
- Snacks, mineral water, and free Wi‑Fi: helpful for the few-hour block of time
- Personal details: people often add stamping or engraving for a souvenir that feels like yours
- Budget for extras: silver over 5 grams costs 85,000 IDR/gram; gemstones add 100K–500K IDR
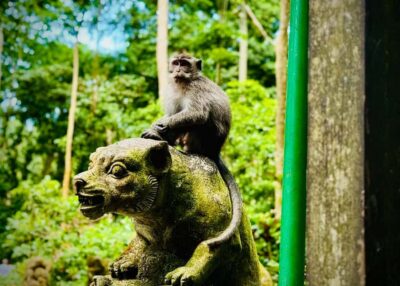
Long-tailed macaques and mossy temple gates, up close.
- Ubud: Monkey Forest, Jungle Swing, Rice Terrace, and Water Temple★ 5.0 · 7,160 reviews
- Ubud: Full-Day Rice Terrace, Monkey Forest & Waterfall★ 5.0 · 2,634 reviews
- Hands-On Silver Jewelry Making Near Ubud’s Monkey Forest★ 4.9 · 1,789 reviews
- Ubud: Monkey Forest, Ceking Rice Terraces and More– Full Day★ 4.7 · 917 reviews
Where the class fits in a Monkey Forest day
The meeting point is right by Jalan Raya Jl. Monkey Forest in Ubud (Jalan Raya Jl. Monkey Forest, Ubud, Kecamatan Ubud, Kabupaten Gianyar, Bali 80571). The activity ends back at the same place, which makes it easy to fold into a half-day plan.
This is also a good option if you want something that feels “local workshop” rather than a big tourist stop. It’s near public transportation, and while shuttle service isn’t included, you can plan to get there on your own (taxi, ride-hail, or local transport).
If you’re combining it with Monkey Forest, think of this as your creative cooldown. Reviews note it’s about a 15-minute walk from Monkey Forest, so you can mix nature watching with something productive and memorable without feeling like you’re bouncing across the island all day.
Price and what $41.85 actually buys you
At $41.85 per person, the value here is in what’s included. Your price covers the workshop materials and tools, plus snacks and mineral water and free Wi‑Fi. You also get one take-home item (each participant makes only one silver jewelry piece), with the silver provided in the 1–5 gram range depending on your design.
That “from 1–5 grams” detail matters. Even if your final design ends up under 5 grams, the pricing is still accounted for as 5 grams. Translation: you’re paying for a solid starter amount of metal, and you’re not expected to guess the gram math yourself.
Where costs can move is if you want more silver than the included amount, or if you want gemstones. More on that in the budgeting section, but the key point is this: the base price is for a complete class with a take-home piece, not just a demo.
The real itinerary: choose a design and turn 925 into jewelry
This workshop is built around making jewelry “from scratch” with a local silversmith. The pace typically runs 1.5 to 3 hours, and you’ll go through the major production steps, not just the fun finishing parts.
Here’s what you can expect, in plain sequence:
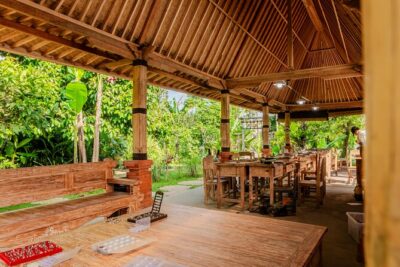
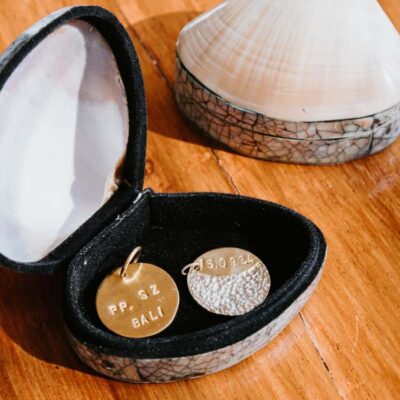
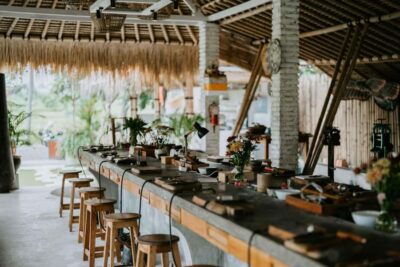
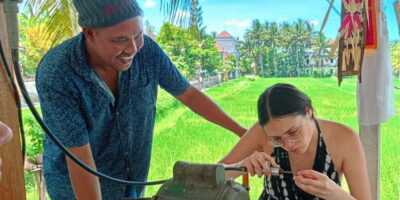
Solder your own Balinese silver ring near the Monkey Forest.
1) Pick your design and plan your piece
You’ll start by choosing from sample designs or working with a design you bring from your imagination. This is where the class can feel slightly rushed, because once you commit to a style, the workshop moves along quickly so everyone can finish within the time window.
The upside: you get to influence the final look. The downside: if you’re indecisive, you’ll feel the clock.
2) Learn tools and materials before you heat anything
You’ll be introduced to what you’re using and why. The metal is sterling silver 925, and the workshop walks you through the process from melting onward.
3) Melt, hammer, press, and shape
You’ll melt pure sterling silver 925 first. After that come stages like hammering and pressing, which help form the metal into the foundation for your jewelry.
You’ll also do shaping and prepare your piece for the next stage, soldering.
4) Solder and then smooth everything down
Soldering is where the workshop shifts from “metalwork” into “making something that will hold together as jewelry.” After soldering, you’ll file and smooth the piece.
Sanding and polishing are the finish line. This is where your ring or jewelry starts looking like something you’d actually wear, not a prototype.
5) Finish, polish, and take it home
When your piece is finished, you leave with your own creation as a souvenir you can wear (or gift). You’re not just watching someone else craft—this is built around hands-on practice.
Choosing your design: personal, practical, and sometimes a little tricky
The class gives you options, and it’s worth knowing what to look for before you commit.
Many designs involve more hands-on steps than others. Some styles may feel easier because your metalwork gets focused on shaping and finishing. Other styles, especially those that are hammered or stamped, often come with extra texture work—fun if you like tactile steps, but more demanding if you prefer a lighter touch.
Personalization shows up in the details. People mention things like stamping words (example: stamping Bali inside a ring) and also engraving. If you want a souvenir that doesn’t feel generic, plan to spend a little extra thought on personalization while you still have time during the workshop.
Also, remember the “one piece only” rule: you can’t share silver with another person. If you’re traveling with someone and want matching jewelry, each of you will typically make your own item, just guided to a similar style.
Meet the silversmiths: helpful guidance makes the difference
The workshop works because the teaching is practical and patient. The group size is capped at 10 travelers, which keeps the class from turning into a conveyor belt. You’ll have a chance to get help when you hit a snag with shaping, soldering, or getting the finish just right.
You’ll also see how different teachers guide. Reviews mention names like Eddie, Ino, Ketut, and Sugita, each described as helpful and supportive. If you’re the kind of person who learns best by doing and getting small corrections in real time, this format fits well.
If you’re going solo, it’s also not awkward. People note doing the class alone and still getting a full step-by-step walkthrough. Couples can be a great match too, especially if you want matching rings and a shared activity that ends with two wearable souvenirs.
And yes, people have mentioned that the process can feel like a workout. You’ll be using tools and working metal through multiple stages, so keep expectations realistic.
What to budget for: grams, gemstones, and the “extras” reality
Most first-timers get surprised by one thing: the class includes the base silver, but you can add upgrades.
More silver than included
Your take-home piece starts in the 1–5 gram range. If you want over that included amount, there’s an additional fee of 85,000 IDR per gram for more than 5 grams.
There’s also that earlier note: if your silver ends up under 5 grams, it’s still accounted for as 5 grams. So the included value isn’t something you can shrink down to a tiny novelty piece.
Gemstones
Gemstones are optional. The price range given is 100K to 500K IDR, depending on type and size. If you want color, this is where you’ll spend extra, but it also tends to make the ring feel more “complete,” especially if the silver style is simple.
Keep one more rule in mind
You’ll create your own jewelry and it’s directly yours. You can’t share the silver with someone else, so plan your design around what you want on your own piece.
Snack breaks, free Wi‑Fi, and why that small stuff matters
The workshop includes snacks and mineral water, plus free Wi‑Fi. That might sound like a minor detail, but for a hands-on class, it helps you stay comfortable through the full session.
Also, it gives you flexibility. If you’re traveling with kids or you’re timing your day around other Ubud activities, having an easy place to recharge and check messages matters more than you’d think.
Accessibility and who this experience suits best
This class is listed as wheelchair and stroller accessible. That’s a big plus in Ubud, where some “workshops” can be tough to reach or hard to move through.
It’s also a good match if you don’t have jewelry-making experience. The class is designed for beginners: you’re taught the process, and you can make a piece even if this is your first time touching silversmith tools.
Best fit types:
- Couples wanting matching souvenirs and a shared activity
- Solo travelers who like learning by doing
- Families with older kids (reviews mention it working well for children who want a hands-on memory)
- Anyone who wants a wearable keepsake made with real metalwork, not just a craft
Should you book this Ubud Monkey Forest Silver Class?
Book it if you want a hands-on sterling silver souvenir you can actually wear, and you enjoy working with your hands and learning a process step by step. The price is fair for what you get: tools, materials, snacks, and a take-home piece made by you. The small group size also helps you feel supported instead of rushed.
Don’t book it if:
- You want something passive or purely observational
- You’re very sensitive to physically repetitive tasks
- You’re not comfortable budgeting for optional upgrades like extra silver grams or gemstones
- You need a shuttle included, because transport to the meeting point is on you
One last practical note: you can cancel for free up to 24 hours in advance for a full refund, so you have flexibility if your Ubud plans shift.
FAQ
How long is the Ubud Monkey Forest Silver Class?
The class runs about 1.5 to 3 hours. Each participant makes one silver jewelry piece during that time.
What silver will I make, and how much can I take home?
You’ll work with sterling silver 925. The take-home weight is 1–5 grams, depending on your design. If your jewelry is under 5 grams, it is still accounted for as 5 grams.
Do I need any jewelry-making experience?
No. The class is designed so you can learn the process from scratch with guidance from local silversmiths.
What’s included in the price?
Included are all necessary materials and tools, snacks, mineral water, and free Wi‑Fi. You also take home the silver jewelry you make.
Are there extra costs if I want more silver or gemstones?
Yes. If you want more than 5 grams, there’s an additional fee of 85,000 IDR per extra gram. Gemstones can be added for 100K to 500K IDR, depending on type and size.
Where do I meet, and does this include a shuttle?
You meet at Ubud Monkey Forest Silver Class, Jalan Raya Jl. Monkey Forest, Ubud. Shuttle service is not included, so you’ll need your own transport to get there.
Is the workshop wheelchair and stroller accessible?
Yes, the workshop is listed as wheelchair and stroller accessible.
More Ubud Tours We Rate





Make Your Own Silver

Into the Monkey Forest

Just added around Ubud
- Ubud: White Water Rafting with visit Ubud Monkey Forest
★ 5.0 · 3 reviews - Private Guided Bali Car Charter
★ 5.0 · 3 reviews - East Bali and Lempuyang Temple Tour
★ 5.0 · 3 reviews - Bali Downhill Cycling and White Water Rafting
★ 5.0 · 3 reviews - Cave Tubing Adventure in Ubud
★ 5.0 · 3 reviews
Monkey Forest Tours, compared.
 ★ 5.0Monkey Forest, Jungle Swing, Rice Terrace, and Water TempleFrom $317,160 reviews
 ★ 5.0Full-Day Rice Terrace, Monkey Forest & WaterfallFrom $232,634 reviews
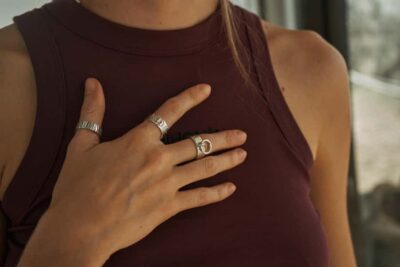 ★ 4.9Hands-On Silver Jewelry Making Near Ubud’s Monkey ForestFrom $281,789 reviews
 ★ 4.7Monkey Forest, Ceking Rice Terraces and More– Full DayFrom $37917 reviews
 ★ 4.8Sacred Monkey Forest Sanctuary Ticket and Guided TourFrom $16675 reviews
 ★ 5.0Ubud Tour with Monkey Forest Waterfalls Temples and MoreFrom $30495 reviews
 ★ 4.8Monkey Forest Sanctuary & Jungle Swing TourFrom $16360 reviews
 ★ 5.0Gorilla Cave ATV Bali Ubud, Monkey Forest, Temple, and LunchFrom $75295 reviews
Browse the lists this tour appears in